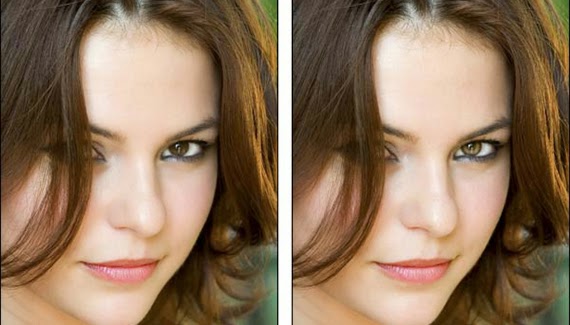
Here’s a super-simple technique for enhancing the most important bits of any portrait: the eyes. It’s a quick and painless way to make the eyes really stand out and take on a slightly sultry and burning look. To illustrate, we’ll use a photo of a beautiful woman.
Arrange your workspace
Step 1:
Pop open the photograph and quickly copy the foundation layer by pressing Command + J (PC: Ctrl + J). You don't need to do this, yet its a decent thought to shield thyself from, well, thyself and it'll additionally provide for you an approach to once again off of the impact on the off chance that you try too hard.
NOTE: You could also select just the iris area with the Lasso tool and jump that up onto its own layer. If you have other retouching to do, that might be the best choice.

Step 2
Pick Window > Arrange > New window for [document name]. Zoom into the new window so you can see what you're doing by pressing Command + (PC: Ctrl + ), and keep the first window at generally the size the picture will print at. This will permit you to perceive how a lot of an impact the improvement is having. Anything you do in one window is consequently reflected in the other. It's a helpful approach to work when you're correcting.

This is what my workspace looks like now:

Enhance the iris
Step 3
Snatch the Dodge tool (circled in red beneath), and quickly provide reason to feel ambiguous about your eyes the choices bar at the highest point of your screen. Bring down the Exposure to around 30%. Mouse over to the photo and size the brush cursor so it fits just the iris territory (be mindful so as not to brush over the dim external edge of the iris).

TIP: Press the left bracket key, [, to cycle up in brush size, and the right bracket key, ], to cycle down.
That is truly all there is to it. Since we brought down the Introduction, we can "fabricate" the impact to the force we like by keeping on evading the iris. On the off chance that we go on the verge of excessively far, we can diminish the haziness of the copied layer to decrease the impact, in the same way as so:

Here’s our before and after

0 comments:
Post a Comment